Course Progress
Course Navigation
- Introduction to the Shopping Cart
- Add a Customer Invoice
- Use Gramtracker
- Discount Calculator
- Advanced Add to Cart
- Print Labels from an Open Cart
- My Cart Favorites Introduction
- Add a Counter Sale Invoice
- Add a Quote
- Quote Homepage
- Search for a Quote
- Edit a Quote
- Convert a Quote into an Invoice
- Add a Transition Invoice
- Edit a Transition Invoice
- Invoice Homepage
- Search for an Invoice
- Edit a Customer Invoice
- Closing Reports
MMJ Dispensary Homepage - Medical
Course
We will now go over the MMJ Medical Dispensary Homepage.
The “MMJ Dispensary Homepage” is a collection of links that allows dispensary or sales agents to efficiently access the tools they will need most often.
You can view the “MMJ Dispensary Homepage”, or set it as your default.
Hover over “Home” at the top of any page.
Select “Chooser” from the first column.
Scroll down to “Custom or Special Interfaces” and select “View” or “Set As Default” as needed.
Refer to the "Use the Chooser” topic for more details.
The page allows you to:
“Swipe DL” - A “customer” can be located or added by “swiping” their driver’s license using an electronic barcode or magnetic stripe reader.
The “cog wheel” provides settings options for this search.
Place the cursor in the empty field.
“Swipe” or “Scan” the license.
Select “Swipe DL”.
After swiping the drivers license or ID you can Add a new customer, update an existing customer, or add the customer to the queue.
Refer to the “Add a Customer”, “Edit a Customer”, or “Add A Customer to the Queue” lessons for details.
“21 Born On” - This displays the date the “Customer” must have been born on or before.
Customer Name or ID” - A customer can be added or located by first searching for their name or ID number.
Electronic scanning devices may also be used in this box to scan customer ID’s.
Enter all or part of the name or ID in this field.
Select “Go Search”.
This will search for any matching data in an active customer profile.
Once a customer is added to the Queue, this home page will show options for “Customer Queue” - This shows the customers waiting to make a purchase, or currently making a purchase.
The queue will display:
This home page allows you to:
“Filter by Sub Queue” - Show only the entries from a specific “Sub Queue”. Choose the specific “Sub Queue” or “All” from the list and select “Filter”.
“Customer” - Select the name to view the customer log. Refer to the “Add, Edit, or Review Customer Logs” topics for details.
Adding a customer to the queue will allow you to create a “New Cart” for this record, associated with the queue. Start a new purchase for the customer. Refer to the “Add a Customer Invoice” lesson for more details and other options for creating a customer invoice.
From this page you can, “Edit” the queue entry details such as “Sub Queue” manually.
The Queue Home Page and other Queue Topics provides more options for managing customer queues.
Other options on this page include:
“Quick Buttons” - This contains links that allow users to easily navigate to parts of the system that are most likely to be useful.
“Clock In/Out” - A user can quickly clock in or out. Refer to the “Clock In/Out, My Hours, and My History” for details.
“My Cart Favorites” - A user can quickly access “My Cart Favorites” pricing options. Refer to the “My Cart Favorites Introduction” for details.
“Customer Logs” - A user can quickly access customer logs, which provides access to customer details and interaction notes. Refer to the “Add, Edit, or Review Customer Logs” lesson for details.
“Invoice Homepage” - A user can quickly access the “Invoice Homepage”. Refer to the “Invoice Homepage” lesson for details.
“Inventory Homepage” - A user can quickly access the “Inventory Homepage”. Refer to the “Inventory Homepage” lesson for details.
“Cultivation Homepage” - A user can quickly access the “Cultivation Homepage”. Refer to the “Cultivation Homepage” lesson for details.
“MMJ Operations Homepage” - A user can quickly access metrics and tools related to the overall operation.
“Reports Homepage” - A user can quickly access pre-built or “canned” reporting options. Refer to the “Reports Homepage” lesson for details.
“Closing Report” - A user can quickly create a closing report. Refer to the “Closing Reports” lesson for details.
“Classic Homepage” - A user can quickly access even more tools to navigate the system. Refer to the “Classic Homepage” lesson for details.
At the bottom of the MMJ Dispensary Home Page, “RFID or Batch #” - A user can quickly search for batch details.
Enter or scan a RFID or batch number.
Select “Search” to locate a RFID or Batch Number.
“Ecommerce & Live Menu Orders” - This shows a queue of orders placed through online orders or quotes pending completion.
“Order number” - Select the “Order Number” to review the “Order” or “Quote”.
“Cancel” - Select this to “Cancel” the “Order” or “Quote” to remove this order from this queue.
“Restore Order” - Restores the order to the “Cart” to facilitate order completion. Refer to the “Convert a Quote into an Invoice” lesson for details.
“Order Homepage” - This is also known as the “Quote Homepage”. Refer to the “Quotes Homepage” lesson for details.
Downloads & Uploads
Downloads
Download these files for an easy printer friendly version of the content of this course.
[uo_show for='loggedout']
Login/Create an account to view downloadable's
[/uo_show]
[uo_show for='loggedin']
[/uo_show]
Uploads
Use a Contact Us form to schedule a demo, request a consult or support.
Practice
Prepare to earn points & a certificate of completion for finishing this course. If you practice and complete this course prior to your live demo, we will be able to dig a little deeper into how to maximize your business success on ADILAS software.
[uo_show for='loggedout']
Login/Create an account to view practice exercises.
[/uo_show]
[uo_show for='loggedin']
What are you waiting for? Login and prepare to follow along for the next topic or demonstration of how to use ADILAS software for your cannabis business.
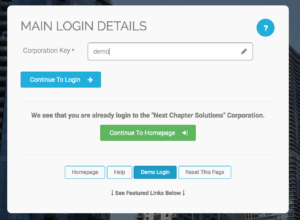
Bob Marley’s “Secret” ADILAS Demo Login
You are welcome to train yourself Bob Marley Style. Use Adilas’ cannabis specific play site to test and try new features in Adilas.
Click here to Go To the Adilas Login Page.
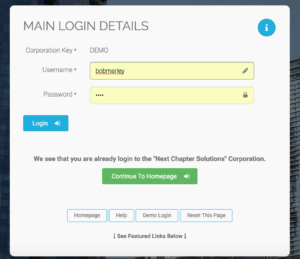
Or enter CORP KEY: DEMO
Enter Password: 1234
Select Login.
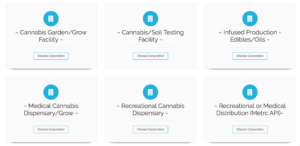
There are multiple examples to look at. You will notice, they all look and feel a little different. The system is extremely customizable.
Choose a Corporation.
Select Continue to Home Page.
Click your next topic to continue with your e-Demo.
[/uo_show]
Tools
-

Adilas System Set Up (4)
-

All Access Course Pass (3)
-

Applications & Licensing (2)
-

Business Documents (308)
-

Consulting & Training (6)
-

Courses (25)
-

e-learning, bundles and memberships (3)
-

Hardware (23)
-

Hardware Bundles (4)
-

Software (3)
-

Software Demo (1)
-

Standard Operating Procedures (178)
-

Training Manual (127)
-

Web Design & Development (2)


